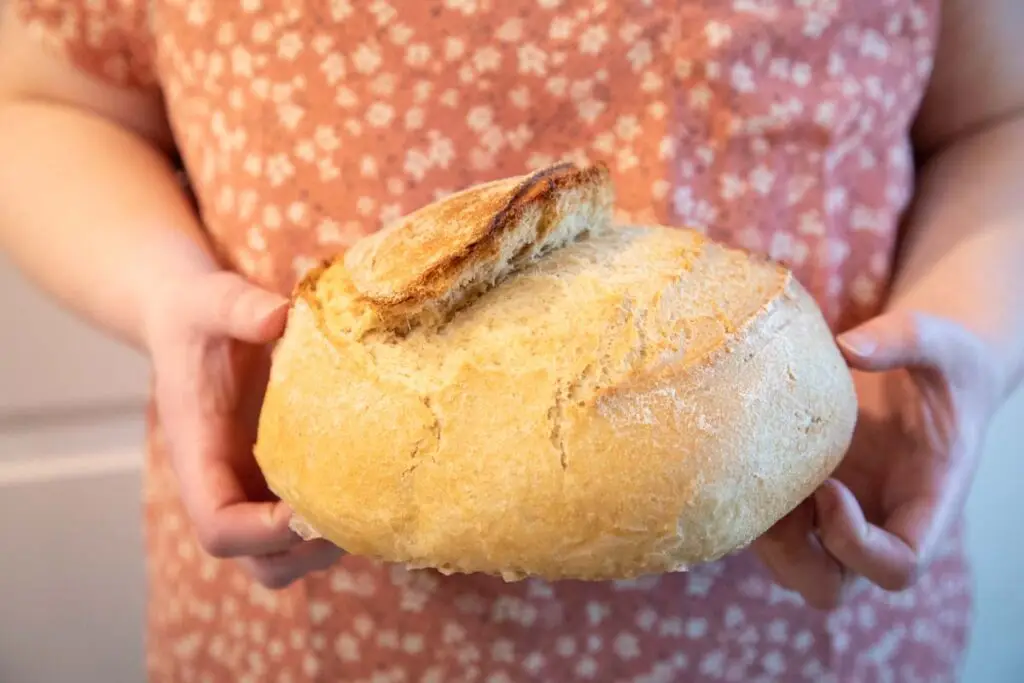
Homemade Freshly Milled Flour Honey Sourdough Recipe
This post may contain affiliate links, which means I’ll receive a commission if you purchase through my links, at no extra cost to you. Please read full disclosure for more information.
Table of Contents
There’s something truly special about baking bread from scratch, but when you take it a step further and mill your own flour, the experience becomes even more rewarding. The aroma of fresh milled flour, the wholesome taste of whole grains, and the deep satisfaction of crafting a loaf from start to finish—it’s a process that connects us to the roots of traditional baking.
Unlike store-bought commercial flour, which can sit on shelves for months and lose some of its nutrients and flavor, freshly milled flour is packed with natural oils, vitamins, and fiber. It gives bread a richer taste, a slightly nutty aroma, and a beautiful golden color. However, baking with fresh flour is a little different from using pre-packaged varieties. It absorbs more water, develops gluten differently, and requires a bit of patience to get the perfect rise and texture.
In this post, I’ll walk you through the process of making a beautiful, hearty loaf using freshly milled whole wheat flour. There is a learning curve to making bread with freshly ground wheat, so give yourself grace when learning this new skill. Whether you’re new to milling your own grains or looking for a tried-and-true recipe, this guide will help you create a loaves of bread that are nutritious, flavorful, and perfect for your homemade bread collection.
Nutritional Benefits of Freshly Milled Flour
Freshly milled flour is far more nutritious than store-bought white flour, which often undergoes processing that strips away essential nutrients. When you mill your own flour, you retain the bran, germ, and endosperm, ensuring that your bread is packed with vitamins, minerals, and fiber.
Higher Fiber Content – Whole grain flour contains the bran, which is rich in fiber, aiding digestion and promoting gut health.
More Vitamins & Minerals – Fresh flour is loaded with B vitamins, vitamin E, iron, magnesium, and zinc, which support energy levels, brain function, and immunity.
Healthy Fats & Antioxidants – The wheat germ contains natural oils and antioxidants that help reduce inflammation and support heart health.
No Additives or Preservatives – Unlike commercially processed flour, freshly milled flour has no chemical bleaching, preservatives, or synthetic nutrients.
Lower Glycemic Impact – The intact grain structure helps slow digestion, preventing blood sugar spikes and keeping you fuller longer.
Why We’re Using Sourdough Starter Instead of Active Dry Yeast
In this recipe, we’re using a sourdough starter instead of active dry yeast as our natural leavening agent. Unlike commercial yeast, which provides a quick and predictable rise, sourdough fermentation relies on wild yeast and beneficial bacteria to develop structure, flavor, and digestibility over time.
Key Differences & Benefits:
Natural Leavening – Sourdough starter contains wild yeast that helps the bread rise, eliminating the need for store-bought yeast.
Longer Fermentation = More Flavor – The extended fermentation process enhances the depth of flavor, creating a slightly tangy, complex taste that commercial yeast can’t replicate.
Better Digestibility – The bacteria in sourdough help break down gluten and phytic acid, making the bread easier on digestion and improving nutrient absorption.
Improved Shelf Life – The acidity from fermentation acts as a natural preservative, keeping the bread fresher for longer without artificial additives.
Using sourdough starter allows us to create a more wholesome, flavorful, and artisanal loaf, with a chewy texture, crisp crust, and rich character that only natural fermentation can achieve.
Benefits of Sourdough with Freshly Milled Flour
Combining sourdough fermentation with freshly milled flour creates an incredibly nutritious, digestible, and flavorful bread. Here’s why this combination is so beneficial:
1. Enhanced Digestibility
Fermentation breaks down gluten – The natural acids and enzymes in sourdough help partially break down gluten, making it easier to digest, especially for those with mild gluten sensitivities.
Phytic acid reduction – Freshly milled flour contains phytic acid, which can inhibit mineral absorption. Sourdough fermentation naturally reduces phytic acid, making nutrients like iron, magnesium, and zinc more bioavailable.
2. Superior Nutrition
Preserves all parts of the grain – Unlike refined flour, freshly milled flour retains the bran, germ, and endosperm, providing fiber, protein, and healthy fats.
Increases beneficial nutrients – The fermentation process enhances B vitamins, folate, and amino acids, boosting the nutritional profile of your bread.
3. Lower Glycemic Impact
Sourdough fermentation slows down carbohydrate digestion, resulting in a lower glycemic index compared to regular bread. This helps regulate blood sugar levels and keeps you fuller for longer.
4. Improved Flavor & Texture
Deeper, more complex flavors – The natural fermentation process develops tangy, slightly nutty flavors that pair beautifully with the earthy taste of freshly milled grains.
Better moisture retention – Whole wheat can sometimes be dry, but sourdough fermentation improves hydration, leading to a softer, more tender crumb.
5. Natural Preservative Qualities
The lactic acid bacteria in sourdough create an acidic environment that slows down mold growth, helping the bread stay fresh longer without preservatives.
6. Gut Health Benefits
Sourdough contains prebiotics (from fiber) and beneficial acids that promote a healthy gut microbiome, aiding digestion and overall gut function.
The Perfect Pairing
By combining sourdough fermentation with freshly milled flour, you get the best of both worlds: a highly nutritious, easier-to-digest, and deeply flavorful loaf of bread. It’s a fantastic way to enjoy the full benefits of whole grains while maximizing their digestibility and taste.
How to Mill Your Own Flour at Home
Milling your own flour is a game-changer for home baking. It gives you fresher, more nutritious, and better-tasting flour compared to store-bought options. To mill your own flour, you’ll need a grain mill (electric or manual) and whole grains like wheat, spelt, rye, or einkorn. Simply pour the grains into the mill, adjust the grind setting (fine for bread, coarser for rustic loaves), and let the mill do the work. The result? Freshly ground flour packed with natural oils, fiber, and vitamins that enhance both flavor and nutrition in your baking. Whether you’re making bread, pastries, or pancakes, freshly milled flour elevates every recipe!
Why Use Hard White Wheat for Freshly Milled Flour?
Hard white wheat is an excellent choice for baking with freshly milled flour, especially when making bread. It has a mild, slightly sweet flavor compared to the stronger, nuttier taste of hard red wheat, making it a versatile option for everything from sandwich bread to artisan loaves.
Lighter Color & Milder Flavor – Produces a golden-hued bread with a less bitter taste than hard red wheat.
High Protein Content (12-14%) – Strong enough to develop good gluten structure, making it ideal for yeast and sourdough breads.
Softer Texture – Yields a tender, yet hearty crumb, perfect for those who want the nutrition of whole wheat without the density.
Whole Grain Nutrition – Retains the bran and germ, providing fiber, B vitamins, iron, and antioxidants.
By milling hard white wheat fresh, you get a nutrient-dense, flavorful, and easy-to-work-with flour that enhances both taste and texture in homemade bread. It’s a great way to enjoy all the benefits of whole wheat without compromising on lightness or rise!
Types of Wheat for Milling and Baking
When milling your own flour, choosing the right type of wheat is key to achieving the desired texture, flavor, and baking performance. Here’s a breakdown of the main types of wheat used for home milling:
1. Hard White Wheat
- Best for: Yeast breads, sandwich loaves, artisan loaves
- Protein Content: 12-14%
- Characteristics: Milder, slightly sweet flavor with a lighter color than hard red wheat. Produces a softer yet strong-textured bread while retaining whole grain nutrition.
2. Hard Red Wheat
- Best for: Rustic bread, whole wheat loaves, sourdough
- Protein Content: 12-15%
- Characteristics: Bold, nutty, slightly bitter flavor. Higher in tannins than white wheat, which gives it a deeper, more robust taste. Produces denser whole wheat bread with a chewy texture.
3. Soft White Wheat
- Best for: Pastries, cakes, cookies, muffins
- Protein Content: 9-11%
- Characteristics: Lower protein and gluten content make it ideal for tender baked goods. Has a light, slightly sweet flavor and a soft texture.
4. Soft Red Wheat
- Best for: Biscuits, crackers, pancakes, quick breads
- Protein Content: 9-11%
- Characteristics: Similar to soft white wheat but with a slightly earthier flavor. Often used in Southern-style baking for biscuits and pastries.
5. Durum Wheat
- Best for: Pasta, some artisan breads
- Protein Content: 12-15% (but lower gluten strength)
- Characteristics: Hardest wheat variety, rich in protein but weaker in gluten development. Has a golden-yellow color and a nutty flavor, perfect for homemade pasta.
6. Einkorn Wheat (Ancient Grain)
- Best for: Sourdough, rustic loaves, cookies, muffins
- Protein Content: 14-16% (but lower gluten strength)
- Characteristics: One of the oldest grains, with a rich, buttery flavor. Lower gluten structure means it doesn’t rise as high as modern wheat but is more digestible.
7. Spelt Wheat (Ancient Grain)
- Best for: Breads, muffins, pancakes, pasta
- Protein Content: 12-15%
- Characteristics: Mild, slightly nutty and sweet flavor. Spelt has a delicate gluten structure, making it easier to digest but more fragile when kneading.
8. Kamut® (Khorasan Wheat)
- Best for: Bread, pasta, pastries
- Protein Content: 12-14%
- Characteristics: Large golden kernels with a sweet, buttery flavor. Higher in protein and minerals than modern wheat, but with a softer gluten structure.
Each type of wheat has its own unique qualities, making it important to choose the right one based on what you’re baking. For bread, hard white and hard red wheat are the best options, while soft wheats work well for pastries and cakes.
Developing Gluten Over Time: Stretch and Fold Method in Sourdough
While traditional kneading strengthens gluten quickly, gluten can also be developed over time through a gentler process—especially in sourdough baking. This method relies on time, hydration, and strategic handling instead of intense kneading.
How Gluten Develops Over Time
- Hydration (Autolyse Phase) – When flour absorbs water, enzymes begin breaking down proteins into gluten, starting the gluten formation naturally.
- Bulk Fermentation & Stretch and Folds – Instead of kneading, periodic stretch and folds help align and strengthen gluten strands gradually.
- Long Fermentation – The extended rise (typically 4-6+ hours) allows gluten to continue developing passively as natural fermentation strengthens the dough structure.
How to Use Stretch and Fold to Build Gluten
- First Fold (30-45 min after mixing) – Take one side of the dough, gently stretch it up, then fold it over the center. Rotate the bowl and repeat on all four sides.
- Repeat Every 30-45 Minutes – Perform 3-4 sets of stretch and folds over the next 2-3 hours. Each set strengthens gluten while keeping the dough airy.
- Final Dough Readiness – After the last stretch and fold, the dough should feel stronger, smoother, and more elastic, meaning it has developed enough gluten to hold its shape during shaping and baking.
This gentle yet effective approach creates a well-structured loaf with an open crumb, chewy texture, and deep flavor—ideal for sourdough bread!
How to Store Sourdough Bread for Maximum Freshness
Proper storage keeps sourdough bread fresh, flavorful, and crusty for as long as possible. Since sourdough has natural acidity that helps it resist mold, it stays fresh longer than commercial bread, but it still needs the right care.
Short-Term Storage (1–2 Days)
- Keep the cut side down on a wooden cutting board or wrap it loosely in a tea towel.
- This preserves the crust while preventing it from drying out too quickly.
Room Temperature (Up to 5 Days)
- Store in a paper bag, bread box, or wrapped in a cotton towel to allow airflow while keeping moisture balanced.
- Avoid plastic bags unless you prefer a softer crust—they trap moisture, making the bread chewier.
Refrigeration (Not Recommended)
- The fridge accelerates staling due to moisture loss, so it’s best avoided unless you live in a very humid climate.
Freezing (For Long-Term Storage)
- Slice the bread before freezing for easy access.
- Wrap tightly in plastic wrap or a freezer-safe bag, then place in an airtight container.
- To thaw, let slices sit at room temperature or toast them straight from frozen.
Reviving Stale Sourdough
- Oven Method: Lightly spritz the crust with water and bake at 350°F (175°C) for 10 minutes to restore crispness.
- Steam Method: Wrap the loaf in foil and place it in a warm oven with a small dish of water for extra moisture.
With proper storage, your sourdough will stay fresh, flavorful, and ready to enjoy for days!
Why These Ingredients Matter in Our Freshly Milled Sourdough Bread
Each ingredient in this recipe plays an essential role in creating a well-balanced, flavorful, and beautifully textured loaf. Let’s break down why we need each one:
1. Freshly Milled Hard White Wheat Flour
- Structure & Nutrition: The backbone of our bread, freshly milled hard white wheat flour provides protein for gluten development, ensuring a sturdy but soft crumb.
- Flavor & Color: Hard white wheat offers a mild, slightly sweet taste with a golden hue, making it perfect for a whole wheat loaf without the bitterness of red wheat.
- Nutrient Density: Unlike refined flours, freshly milled flour retains bran, germ, and endosperm, giving us fiber, B vitamins, iron, and healthy fats.
2. All Purpose Flour
Balances Texture – Softens the density of freshly milled flour, resulting in a lighter, more tender crumb.
Improves Gluten Structure – Supports better rise and elasticity for an easier-to-shape dough.
Creates Versatility – Makes the loaf ideal for everyday use—perfect for toast, sandwiches, or snacking.
By blending the two, you get the best of both worlds—the wholesome depth of whole grain and the lightness and elasticity of white flour—making this bread ideal for everyday slicing, sandwiches, or toasting.
3. Water
- Hydration: Activates the flour, allowing gluten strands to form and creating the right dough consistency.
- Fermentation: Helps feed the sourdough starter by dissolving the starches in the flour, making them accessible for natural yeast and bacteria.
- Crumb & Texture: The right hydration level gives the bread a soft interior while keeping the crust crisp.
4. Sourdough Starter
- Natural Leavening: Provides the wild yeast and bacteria needed to ferment the dough, making it rise without commercial yeast.
- Flavor Development: Adds a complex, slightly tangy taste while enhancing the natural sweetness of freshly milled flour.
- Nutritional Benefits: The fermentation process reduces phytic acid, making nutrients more bioavailable and the bread easier to digest.
5. Salt
- Flavor Enhancement: Balances the natural sweetness of the wheat and honey, preventing the bread from tasting bland.
- Gluten Strengthening: Tightens gluten structure, improving dough elasticity and helping the bread hold its shape.
- Fermentation Control: Slows down yeast activity, preventing the dough from over-proofing too quickly.
6. Honey
- Flavor & Sweetness: Adds a subtle natural sweetness that enhances the mild flavor of hard white wheat.
- Moisture Retention: Helps keep the bread soft and fresh for longer.
- Fermentation Boost: Acts as an additional food source for the wild yeast in the sourdough starter, giving the dough a gentle fermentation boost.
By using these simple, wholesome ingredients, we create a bread that is nutritious, flavorful, naturally fermented, and perfect for everyday eating.
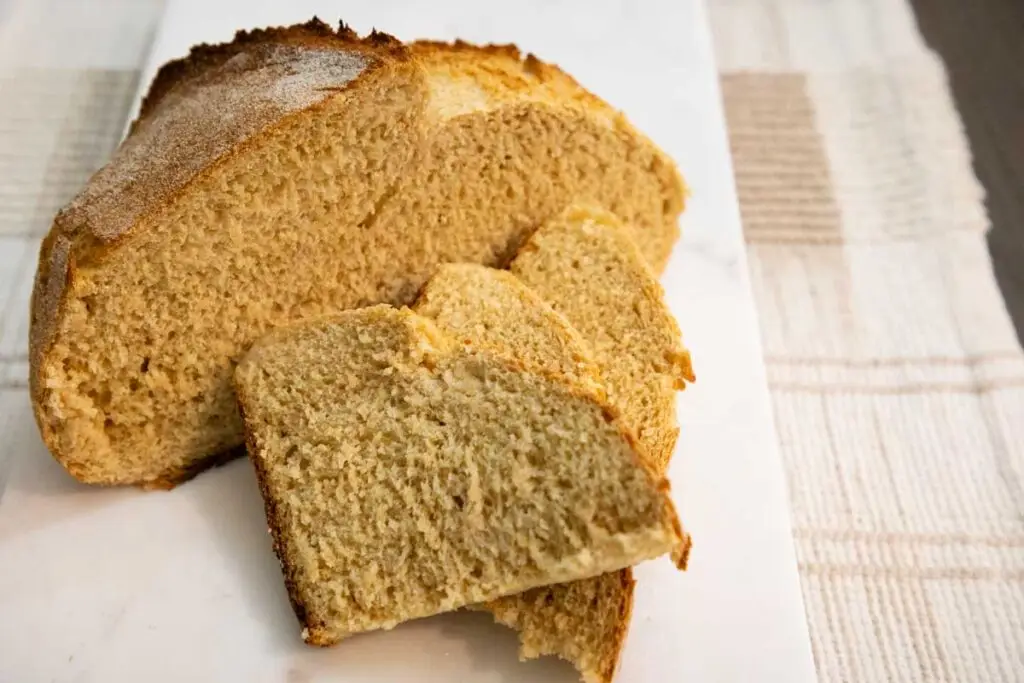
Freshly Milled Flour Honey 50/50 Loaf
This soft and flavorful sourdough loaf is made with 50% freshly milled whole wheat and 50% all-purpose flour, balanced with a touch of honey. It bakes up with a light, open crumb, mild sweetness, and the perfect balance of whole grain nutrition and softness—ideal for toast, sandwiches, or everyday slicing.
Ingredients
- 250 g Hard White Wheat berries, milled
- 280g All Purpose Flour
- 115g Sourdough Starter
- 330g Water
- 90g Honey
- 1 Tablespoon Salt (9 grams)
- 1 Tablespoon yeast (optional for faster baking)
Instructions
- Mill hard white wheat berries into fresh flour.
- Combine the freshly milled flour, all-purpose flour, water, sourdough starter, and honey. Mix until no dry flour remains, then cover and let the dough rest (autolyse) for 20 minutes.
Sprinkle in the salt and mix until fully incorporated. - Perform four rounds of stretch and folds, spaced 30 minutes apart. After the final fold, allow the dough to bulk ferment for about 6 hours.
- Shape the dough and let it rise again for 4–6 hours, or until an indentation gently pressed with your finger springs back slowly and the dough feels light and puffy.
- Preheat the oven to 400°F with a Dutch oven inside. Once preheated, place the dough into the Dutch oven, add a few ice cubes for steam, and cover with the lid.
- Bake for 20 minutes with the lid on, then remove the lid and bake for another 20 minutes, or until the internal temperature of the bread reaches 200°F.
- Let cool before slicing.
Notes
If using yeast:
Combine the flours, water, sourdough starter, honey, and yeast in a large bowl. Mix until just combined, then let the dough rest (autolyse) for 20 minutes. Knead the dough until it passes the windowpane test. Cover and let rise for 1 hour, then gently deflate, shape, and place into your proofing container. Allow the dough to rise again for 30 minutes while you preheat the oven to 400°F with a Dutch oven inside. Bake for 20 minutes covered, then remove the lid and bake for an additional 20 minutes. Let the loaf cool completely before slicing.
