
DIY Reclaimed Wood Rustic Mountain Decor Wall Art


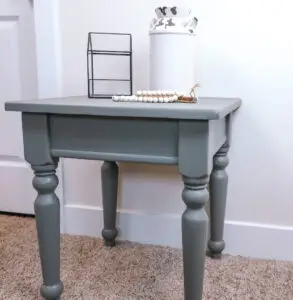
DIY Thrift store Farmhouse End Table Makeover
Creating a beautiful farmhouse style side table is simple and thrifty. With sanding paper, a thrifted table, and stain, you can easily elevate your home decor.

Lemonade Refreshers to brighten up your spring
This is an example of a WordPress post, you could edit this to put information about yourself or your site so readers know where you are coming from. You can create as many posts as you like in order to share with your readers what is on your mind. This is an example of a

Meal Planning Made Easy: Save Time, Cut Waste, and Enjoy Stress-Free Dinners
Meal planning simplifies dinner, saves time, and reduces stress. Learn how to create a weekly plan, cut food waste, and enjoy easy meals!

The Best Eggless Lemon Vanilla Cupcakes with Cream Cheese Frosting
These eggless lemon vanilla cupcakes are light, fluffy, and full of fresh citrus flavor. Made with chia seeds and topped with cream cheese frosting, they’re perfect for summer baking—no eggs needed!

Creamy Pesto Pasta – A Quick and Dreamy Summer Dinner
Pinterest Instagram Facebook Youtube This post may contain affiliate links, which means I’ll receive a commission if you purchase through my links, at no extra cost to you. Please read full disclosure for more information. Table of Contents There’s something about summer that calls for fresh basil, bright flavors, and simple dinners — and this

Amazing Sourdough Discard Banana Bread Recipe
This moist sourdough banana bread is rich, tender, and full of banana flavor. Made with sour cream, chocolate chips, and sourdough discard—it’s the perfect easy recipe for any day of the week.


